
How to get background blurring on photos
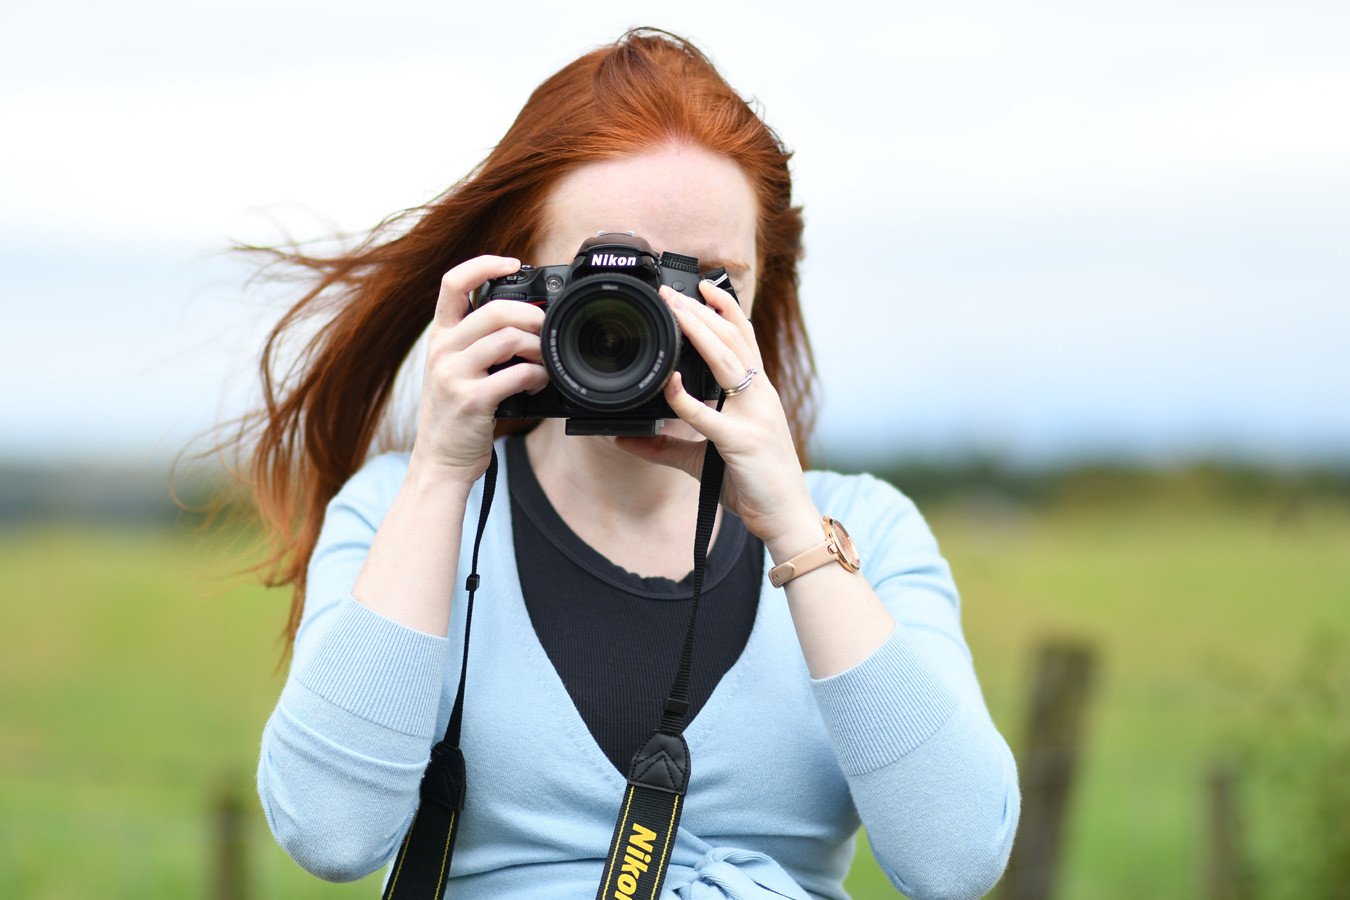
You know those beautiful blurred backgrounds you always see on fashion blogs? The ones that never seem to actually happen when you try to take them yourself? Well, today I’m here to help you out. Or rather, Terry is.
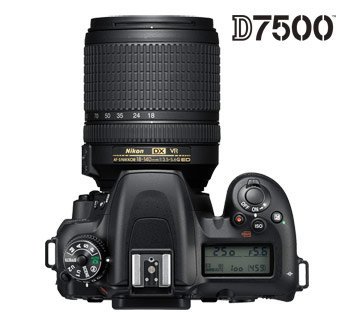
As I mentioned earlier this week, Terry and I have been thinking about upgrading our existing DSLR camera (the Nikon D7000), and, to that end, we’ve been trying out the Nikon D7500, along with a lens that Terry has literally not stopped raving about since it arrived. Seriously, I’m pretty sure that’s what he’s been mumbling about in his sleep recently – it’s THAT good. This finally inspired me to provide a guide to answer my most often asked photography question: “Hey, Amber, how do you get your background all blurry like that?”
Now, the fact is that when I get a blurry background on a photo, it’s normally because the foreground is blurry too, and I’ve messed up with the camera settings again: d’oh! But I’m guessing that’s probably not the answer you were looking for to this one, is it? Also, I’m joking: I DO actually know how to get that amazing bokeh effect, I’m just not very good at explaining this kind of thing. I mean, I’ll write 3,000 words on that one time I got locked in the bathroom, no worries, but ask me to explain anything even remotely technical, and I’ll just be all, “Er, I know how to do it myself, but I don’t know how to explain it to you: sorry.”
And so I turned to Terry.
As Terry’s the guy behind the camera in most of my outfit photos, I asked him what his top photography tip for background blurring would be, and this was his answer:
“Get a decent camera and a lens with the biggest hole possible.”
He still insists it’s as simple as that, (Don’t get me wrong, he takes a mean picture but he’s not much for technical snobbery…) but after some cajoling from yours truly, he laid out his thoughts to this question in a simple comparison, using some of the lenses we’ve acquired over the years. So! Over to Terry…
The best lens for background blurring (bokeh)
Firstly if you want background blurring, otherwise known as Bokeh, in full length fashion pictures then you want a prime lens – that’s a lens that doesn’t zoom. These lenses almost always come with a large aperture (The aforementioned big hole). 1.4 or 1.8 is perfect. 35mm, 50mm and 85mm are the most common sizes. To add to the mix we also tested some prime lenses against two zoom lenses, the 18-300mm and the 18-140mm lens, just to give you something to compare the prime lenses to. You will note I hardly mention camera settings below, all you need to know is how to set the aperture to the lowest number (usually 1.4 or 1.8), then balance out the other settings (ISO and shutter speed) to give a good exposure.
Four lenses do battle for bokeh
All of the images below can be expanded,
so if you want to see them in more detail just click!
18mm
This is the default on most kit lenses. i.e. an 18-140mm lens not zoomed in would produce the picture above. As you can see there is very little background blurring. You can take this shot from very close range which is helpful for tight spaces.
85mm Lens
This 85mm lens gave the best results with excellent Bokeh and perfect focus from head to toe. The only disadvantage is that, to get this shot, you have to stand about 5 meters away from your subject if you are doing full height shots.
300mm Lens
This is a method that most people wouldn’t consider. In short take a zoom lens, stand far away (the above shot was 20 meters) then take the picture on auto. You do not get as good focus as the 85mm and, of course, from that far away it is difficult to communicate with your subject.
Taking a closer look at sharpness
Comparing the three lenses with the most Bokeh
35mm Lens
A problem we have always had with our 35mm lens is to get sharpness across the whole body. In the above image, the face is in focus, but the watch is not.
85mm Lens
As you can see from the above image, both the watch and the face are in perfect focus. Not only that, but this result was achieved very quickly with minimum fuss.
300mm Lens
The above picture was taken at nearly 30 metres away. Although the background blurring is nice, the focus on both the watch and the face is very soft.
VERDCICT: the 85MM is the clear winner
But if you aren’t convinced, here’s another example:
The set-up
In the setup to the right, we simply have a lens cap taped to the table with fairy lights in the background. Each lens was set to its lowest aperture and taken from the best distance to maximise the size of the bokeh in the background.
If you take a look at the three examples below, you will see the 85mm gives largest and most pleasant bokeh.
35mm Lens
85mm Lens
300mm Lens
The conclusion:
If your focus is on full length fashion shoots and you have lots of space to stand far away from your subject then go for the 85mm. If you’re on a tight budget or / and have a tight working space then the 55mm or the 35mm would be a good option. There are of course other more expensive lenses that do an even better job but I wanted to stick to showing examples that an aspiring fashion blogger could reasonably afford!
If you want to stick with your stock lens and use the 300mm technique I talked about earlier then below you will find a mini guide on how to do it. Bear in mind you can use this technique with any zoom lens.

Some 35mm AND 300mm examples


Thanks, Terry!
From my point of view (er, it’s back to Amber again, just in case that wasn’t clear), the main benefit to the blurred background – in addition to the fact that it looks pretty, and gives you that fashion-magazine effect – is that it allows you to shoot just about anywhere, even when the background isn’t great. Since we’ve been trialling the 85mm lens, for instance, our photo process has been a whole lot simpler, and we’ve been able to quickly grab some photos in locations (like the front of our house, for instance!) that I’d otherwise have deemed un-blogworthy. The bokeh effect, though, makes everything look a little better, which, in turn, makes it easier for me to persuade Terry to take some photos while we’re out and about. So, thanks to Nikon for letting us try out the camera and lens – and thanks to Terry for writing most of this post for me!


Chiarina
The image “Getting good bokeh with a zoom lens” is so cool! Thanks for this, I am not a blogger or anything like it, but I enjoyed reading this and will play about with my camera next time I have a chance!
terry@hotigloo.co.uk
Thanks Chiarina! Try using the zoom technique on peoples faces as well, works a treat.
Myra
Bokeh is when you capture six sided light effects in your image – like little light splodges. Blurred backgrounds is measured in depth of field (how much of the image is in focus) 🙂
terry@hotigloo.co.uk
Incorrect. A blurred background is bokeh balls merging together hence the background appearing blurred. Bokeh derives from the Japanese Boke “blur quality”. Also they are only six sided if you have 6 aperture blades in your lens, with a decent lens they appear completely circular, you can even get heart shaped bokeh 🙂
Direct from Nikon…
“Bokeh is defined as “the effect of a soft out-of-focus background that you get when shooting a subject, using a fast lens, at the widest aperture, such as f/2.8 or wider.” Simply put, bokeh is the pleasing or aesthetic quality of out-of-focus blur in a photograph”
Donna
Terry, you take amazing photos! Not only that, you took a complex issue and made it easy to understand and execute. Of course the subject you’re photographing is lovely and that makes it easier! ?
terry@hotigloo.co.uk
Thank you so much, it’s 99% Amber looking gorgeous and 1% my camera skills 🙂
CiCi Marie
Excellent guide, Both! I have a 50mm 1.4 lens and I get on fairly well with it, but we do have a high proportion of full length shots where some part of me isn’t in focus, or sometimes all of me. It looks like the 85mm is more reliable for focus, just a bit of a pain in terms of where the photographer stands… Food for thought though, I want an 85mm now!
terry@hotigloo.co.uk
I feel your pain, I have had the 50mm and 35mm and both were great at full length but a good percentage, as you say, had out of focus areas. I would normally try to get a solid focus on the face then lock the focus for the remainder of the shoot (while trying to keep Amber the same distance away to keep the camera focussed on the same point). Moving to the 85mm has been night and day honestly! The plane of focus is not so shallow so everything has been in focus every time and it does give you that extra bit of blurring.
Sun
At last an easy, concise tutorial on how to blur the background in photographs! Thank you Terry:)
terry@hotigloo.co.uk
You are more than welcome 🙂
Heather
I cannot thank you enough for this post! I am very much NOT in tune with tech of any kind, and photography and cameras are not my friends. This is the type of tutorial that I need!!! Adding the graphics to illustrate your text? SOOO HELPFUL OMG. *Post Bookmarked
terry@hotigloo.co.uk
Thank you so much for saying that! Very glad it was helpful 🙂
Erika
I’m always in need of good photography advice. This was great and was very easy to understand. I wished it wasn’t raining where I am today so I could go out and practice. Thanks, Terry! ?
Terry
Glad you liked the tutorial Erika 🙂
Belinda
Ok, as an amateur when it comes to photography I have to say a HUGE thank you Terry. I am going to print this page out so I don’t forget anything, the memory is going! It’s an age thing ? However, I will be taking this on board. I don’t plan to be a top notch photographer but it sure helps when I need to show good quality sharp images on my website, which I have to add Amber I am still working on after taking your advice on board including the advice in your book which I bought months ago and read, only I’m having to read it again and hope to absorb the information and keep it in my head. Thanks guy’s your both so helpful. x p.s Amber is it right that every time I post a comment I have to fill out the details below? I thought it would on,y have to be done once? x
Amber
It should be auto-filled: if it’s not, it’s probably something to do with the cookies on your computer!
Lisa
Awesome guide! I absolutely love these blurred background photos.
Lisa | Lisa Carmen